I originally posted this tutorial for our members on the Rat Chatter Forums, where I am a moderator. I also wanted to share it on my blog. Everyone can learn to improve their photos with these simple steps. All you need is a photo program like:
Paint Shop Pro,
Adobe Fireworks,
Photoshop, etc. There are also free programs out there on the web that will allow you to edit your photos to show their best.
Picasa 3 is a free photo editing program.
PhotoBucket even has a buit in program for editing photos as well.
I wanted to give a short tutorial on how you can edit your pet photos in just 4 steps to make them look their best. I'll be using Photoshop 11, but you can also do these steps with other photo editing programs.
Note: To view the pictures full size in this tutorial please click on them.
Here is our straight out of camera original photo:
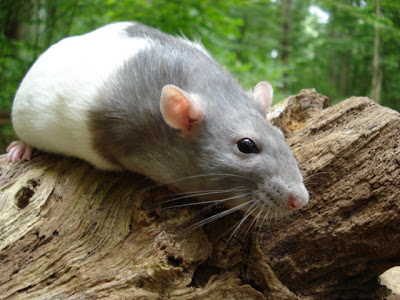
This photo is good, but it has a gray overcast to it and needs to be sharpened & brightened up!
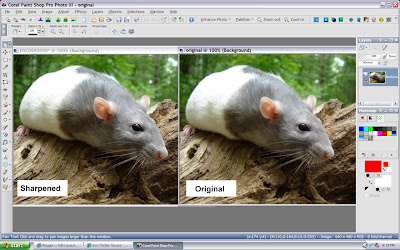
Step 1: Sharpening Your Photo.Sharpening your photo will make it clearer & crisper. (It helps to pick a photo where the subject is in focus.)
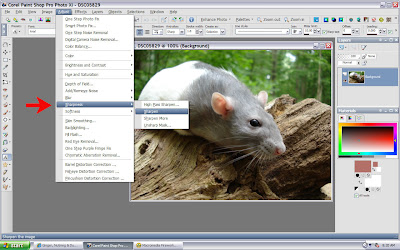
Let's sharpen our photo & compare it with the original. You can see the sharpened photo is clearer.
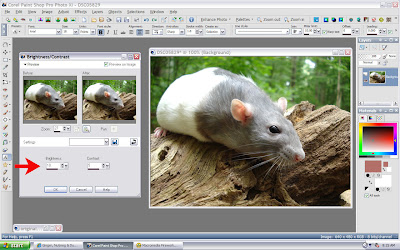
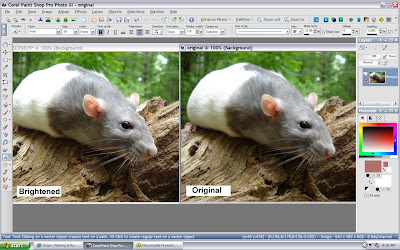
Step 2: Brighten & Contrast.We need to brighten up our photo a bit & increase the contrast.
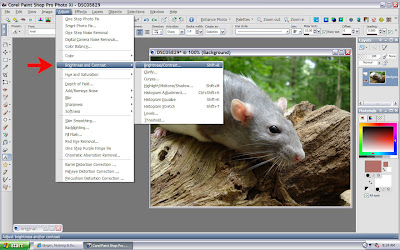
I increased the brightness to 10 & the contrast to 5 for this photo. (You can increase or decrease to your liking.)
Let's Compare:
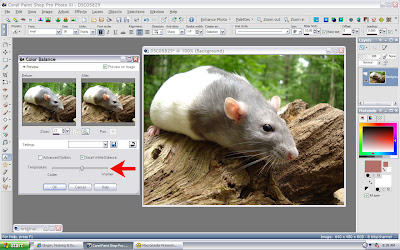
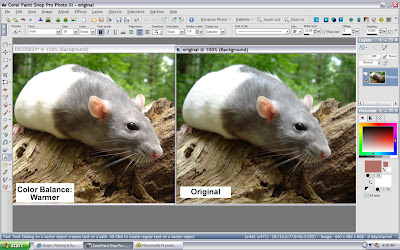
Step 3: Color BalanceI'm going to increase the color balance towards warmer because this photo has a gray overcast look to it.

I slide the bar towards warmer to warm up the photo and get rid of the gray look. (You can increase or decrease to your liking.)
Let's Compare Again:
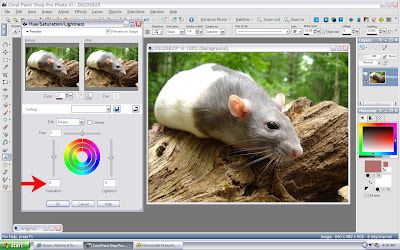
Step 4: Increase SaturationThe last step is increasing the saturation to give the photo more color. This tool is usually called: Hue & Saturation.
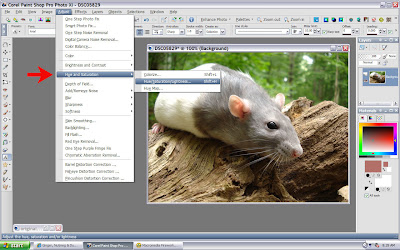
All I'm going to do is slide the saturation bar up to 8, this makes the color stronger. (You can increase or decrease to your liking.)
Let's Compare:

Now that's we've finished let's compare the original photo to the finished version:
Original:Finished: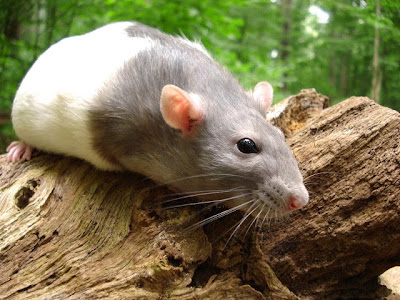
You can see our finished photo is clearer, crisper & brighter than the original. Just 4 easy steps is all it takes to make your photos look their best!
1 more tip for getting clear photos. If your camera has a MACRO setting, it will help for taking close up clear pictures without being blurry.
I use a
Sony Cyber Shot DSC-W55 for all my pictures.


